![]()
![]()
This topic will explain the steps you need to take in order to:
Add the KTML control to the Toolbox.
Install the KTML files for one of the sites.
Before trying to install and use the KTML 4 Visual Studio control, you must have a correctly defined web site, in a location where you can copy and access files.
To add the KTML control to the toolbox, follow the instructions below:
First unzip the downloaded package into a folder on disk (e.g. C:\InterAKT\). This will add two new folders to the site: bin and includes. These folders contain:
inside \bin\ there are two dll files. These represent the Visual Studio control files
inside \includes\ there are several files and folders. These JavaScript and CSS files required by KTML and must reside in the <site_root>\includes\ folder.
Open Microsoft Visual Studio .Net. Then load the project with the site that you copied the files onto.
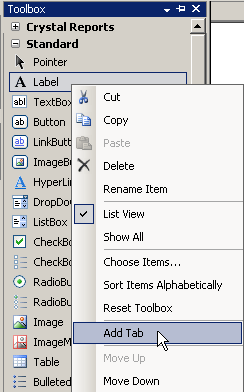
Right-click on the Toolbox
area and from the pop-up menu select the Add tab
option:

The new tab will be added after all others. For
the name use InterAKT:

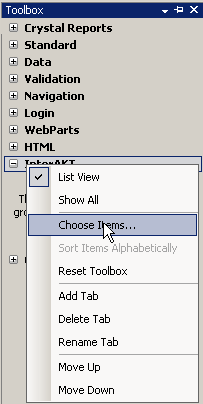
Select the new tab. Right-click on its name, and
from the pop-up menu select the Choose Items
option:

In the Choose Toolbox Items
dialog box click the Browse button to select
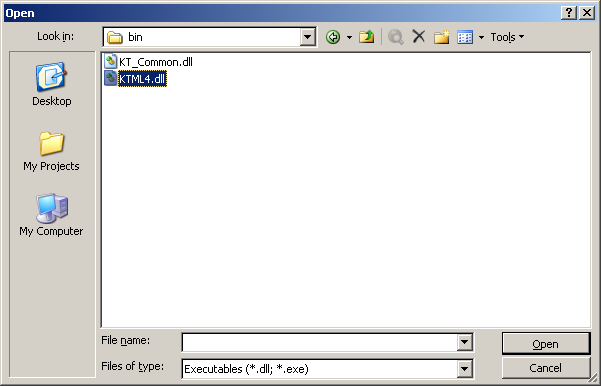
the .dll file to load. In the Open dialog box
browse to the bin folder inside your site
root, and select the KTML4.dll file:

Click Open to select
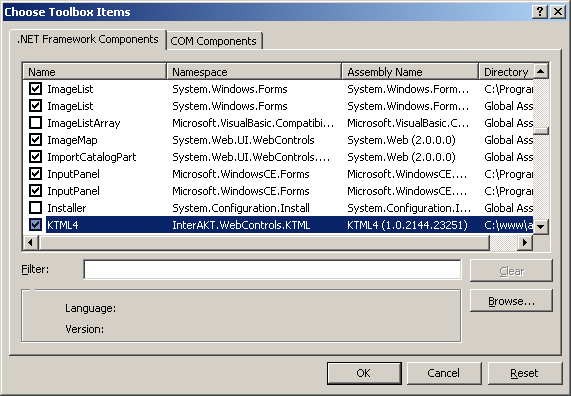
the file. The Choose Toolbox Items dialog box
will reload and will display the found control:

Click OK to apply the
changes and display the control in the Toolbox:

The KTML 4 control has been installed and you can apply the editor from the toolbox and then configure it visually.
To use the KTML control on one of the your sites, you must follow the instructions below:
First copy the \includes\ folder and all of its content into the <site_root> folder. These files are JavaScript files required by the editor.
Add a Textbox, Textarea or Hidden field to which the control will bind to.
From the Toolbox, drag and drop the KTML control onto the page. Configure it from the Properties panel.