|
|
By following this basic 'how to' tutorial, you will create a page that will allow you to insert data into several related tables at the same time. MX Kollection 3 features will be used to automatically pass the ID of the master record to the slave one. This is called a Cascaded Insert Transaction. For the insertion into two related tables, you can use the wizard provided by MX Kollection 3, but in this tutorial you will learn how to insert data into 3 related tables.
If you have the MX Kollection 3 bundle installed, then you have all the needed tools to build this application. Otherwise, the following separate products should be installed on your computer in order to complete the Insert Records Into 3 Tables tutorial:
ImpAKT
The estimated completion time for this tutorial is about 20 minutes. It depends on your authoring knowledge with Dreamweaver and MX Kollection 3.
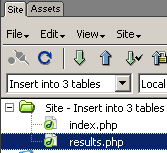
Since it is a one operation tutorial, you will only need two files in
your site: the insert page (which is also the site's index) and a page
to see the results. The file structure will look as in the example below,
and you can create it easily by unpacking the zip
file corresponding to your server model from \tutorials\_HOW_TO\Insert
in 3 tables\ in your site root:

The table structure used for this tutorial is a simple one, storing continents, countries and cities, the relations being obvious:

Note: The database diagram in the image above was built with MX Query Builder (also referred as QuB) to better illustrate the database structure. You do not need to build it in order to complete this 'how to' tutorial.
You can find the scripts needed to create an identical table structure inside the downloaded package, in the \tutorials\_HOW_TO\Insert in 3 tables\db\ folder, as an sql or mdb file, depending on the database server you intend to use. Import them in your database server management software (e.g. PHPMyAdmin, Microsoft Access etc).
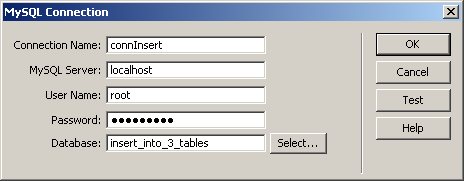
Before you actually start work, there is one detail to take care of: creating a database connection. Open the main index page and create a new connection named connInsert and configure it to connect to your newly created database:

You can now move on and create the actual insert page.