![]()
![]()
In this topic you will learn how to apply and configure the KTML 4 online HTML editor through the Visual Studio control installed in the previous topic.
The KTML4 control can be used either as a stand-alone web control, or as an enhancement to an existing text box, text area or hidden field. If using the first option, you will have to add code that handles the content of the editor - its retrieval through the ktml.text property and the later use. If using KTML to enhance a text box, the editor content will be automatically posted as the field value. Use this last option when you want to enhance existing pages without recreating them, and the first on new pages, where two controls are not necessary.
If you want to use it as a stand-alone control, you will simply have
to drag and drop the KTML editor icon from the
Toolbox onto the page. A visual representation
of the editor will be displayed:
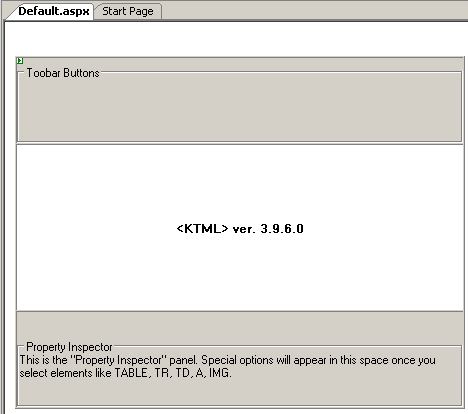
After adding the control, the text edited by the user can be accessed through the KTML_ID.Text property. All control properties can be set within the Properties panel, after selecting it on the page.
The second method of using the control is to bind it to an existing text box or text area. To use KTML as a form field enhancement:
Add a new Text box,
Text area or Hidden field,
if you do not have any on the page. In the examples that follow, a Textbox with the id content
is used:

Next drag and drop the
KTML 4 control from the InterAKT tab of the Toolbox after the Textbox added to the page. An image
will be displayed to symbolize the control:
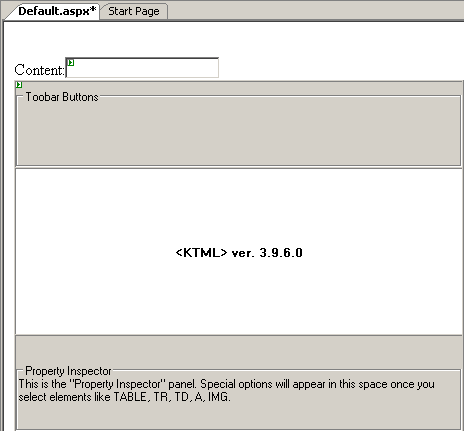
Next you must configure the binding between the
two elements. With the KTML visual representation
selected, in the Properties panel select the ControlToBindTo
entry. In the drop-down menu select the Text Box
created earlier - content.

The KTML content is automatically posted as the text box's text value, so no further code is needed to retrieve and use it in your particular queries.
Whatever method of usage is selected, the KTML control can be configured through the Properties panel. The panel is populated with the control specific options when it is selected on page. Most of the options come with default values already configured, for ease of use.
The options are grouped in four (4) categories:
KTML4 Basic - define basic options: the control to replace, the editor size, toolbars, etc
KTML4 Advanced - define more advanced options: XHTML compliance, background color, etc./
KTML4 Security - specify what types of files can be uploaded and their maximum size, which folders to hide,etc.
KTML4 Toolbars - define what toolbars and buttons will be displayed in the editor.
Misc - change the control ID (not recommended).
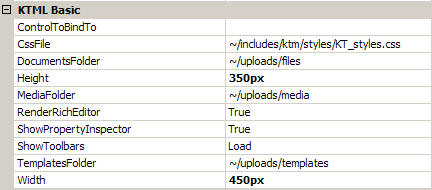
Configure the KTML4 Basic options as follows:
For the ControlToBindTo
select the ID of the Textbox, textarea or
hidden field you want to replace with the editor from the drop-down menu.
Note: You must select an element for this option only if
using KTML to enhance an existing field.
In the CSSFile text field you must enter the path to the Cascading Style Sheets file to use within the editor. This is defined relative to the current document, and you can use the ~(tilde) sign to refer to the site root. By default, the styles used in the editor are stored in the includes/ktm/styles/KT_styles.css file. You can replace this file with your own.
In the DocumentsFolder property box enter the path to the folder where user uploaded document files will be stored. The path is relative to the current document.
In the MediaFolder property box enter the path to the folder where user uploaded media files will be stored. The path is relative to the current document.
In the Height property
box enter a value in pixels (you can omit the px
suffix) as height for the editor.
Tip: You can change the editor height visually, using the
drag handles in Design view. The value will
be updated in the Properties panel.
In the RenderRichEditor drop-down menu select whether to display the KTML control as a simple textarea - the False option - or as a full featured editor - the True option.
In the ShowPropertyInspector
property box select whether property inspectors will be displayed when
selecting tags that support it.
Tip: Property Inspectors allow setting advanced options
for elements, and displaying them is recommended.
The ShowToolbar property decides when to display the editor toolbars. Available options are:
load - the toolbars are displayed as soon as the editor is displayed
focus - the toolbars are displayed only when the editor receives focus
manual - toolbars are displayed by the user, by clicking the corresponding button.
In the TemplatesFolder property box enter the path to the folder where content templates will be stored after upload. The path is relative to the current document.
In the Width property
box enter a value in pixels (you can omit the px
suffix) as width for the editor.
Tip: You can change the editor width visually, using the
drag handles in Design view. The value will
be updated in the Properties panel.
The next set of options to configure is KTML4 Advanced. Through this set of properties you can define the editor behavior:
If you want the editor to receive focus automatically when the page loads, select True for the AutoFocus property.
In the BackColor property box select the color to use as background for the editor. You can either enter the color code or click on the down arrow to display the color picker.
In the ConfigFile property box enter the path to the editor configuration file.
In the HyperlinkManagerFile field enter the URL to the file that provides the hyperlink picker with its options. This file must use the same server technology and supply an array with link names and URL's.
If you want to save the generated HTML code
as XHTML, select True for the SaveCodeAsXHTML
property.
Note: In order to save code XHTML compliant,
you must have configured the HTML
Tidy.
If you want to display generated code as XHTML when switching from design to
code view in the editor, select True for
the ViewCodeAsXHTML property.

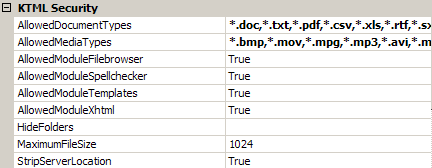
With the options on the KTML4 Security category you can decide what file types to allow and more:
In the AllowedDocumentTypes property box enter the extensions that users can upload to the server for the Documents category. By default, only pdf and txt files can be uploaded.
In the AllowedMediaTypes property box enter the extensions that users can upload to the server for the Media category.
In the AllowedModuleFileBrowser, AllowedModuleSpellchecker, AllowedModuleTemplates and AllowedModuleXhtml decide whether these modules can be ran or not.
In the HideFolders property box enter the names of the folders you do not want users to see in the Remote File Explorer.
In the MaximumFileSize property box enter the maximum allowed file size in kilobytes. The default value is 1024 Kb.
In the StripServerLocation
property box specify whether to remove the server location from links
(True) or not (False).
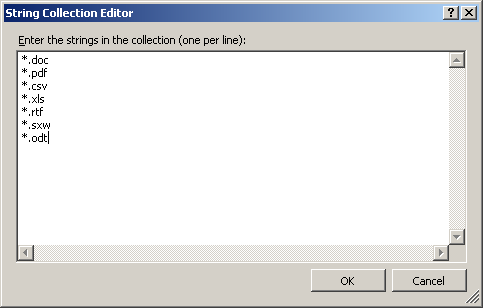
If you need to add a new allowed extension
for document or media upload, you can proceed in two ways: either write
it directly in the property field, or click the
... button that is displayed when the field gets focus. This will
open a new interface that allows you to add extensions - each on its row,
and they will be serialized automatically.
In the KTML4 Toolbars define the buttons ti be displayed in the editor toolbar. This category contains two settings:
From the ToolbarPresets drop-down menu select on of the saved toolbar configuration. Pre-made presets are:
All - all toolbars and buttons are displayed
Mnimal - only a minimal set of buttons is displayed
Text Editing - only toolbars and buttons directly involved with text editing are displayed.
Custom - you can build your own toolbar configuration
In the Toolbars
collection property define what buttons to display. To define the toolbar
contents you have to click on the ... button that is displayed when the
field gets focus. This will load a Collection editor interface, like the
one below
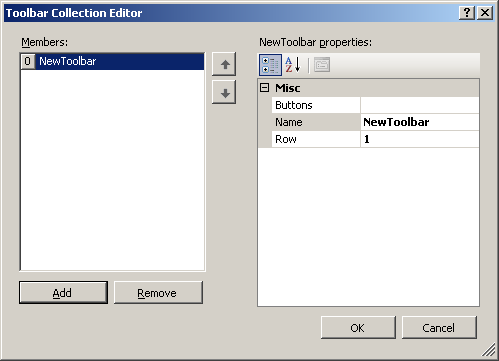
You can add and remove toolbars by clicking on the Add / Remove buttons below the toolbar list. For each toolbar, the Buttons it will display are entered as a comma separated list. You can add buttons either by typing their names separated by commas in the Buttons property field, or by clicking the ... button that is displayed when the Buttons property field gets focus.
In the new dialog box you can enter each
button name on a separate line, and they will be automatically serialized.
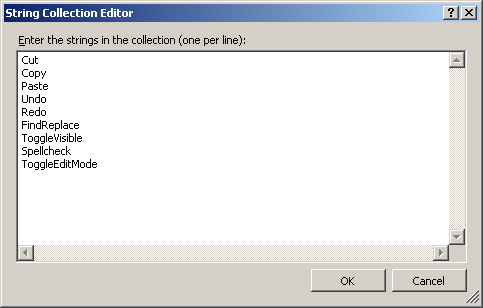
You can find the list of possible buttons
in the KTML4 ASP.NET API [link:API ONLINE].
In order for the changes made in the toolbar
user interface to have effect, in the ToolbarPresets
drop-down menu you must select the Custom
option.

When you have finished configuring the control,
save the page and preview it in a browser. Instead of the textbox, the
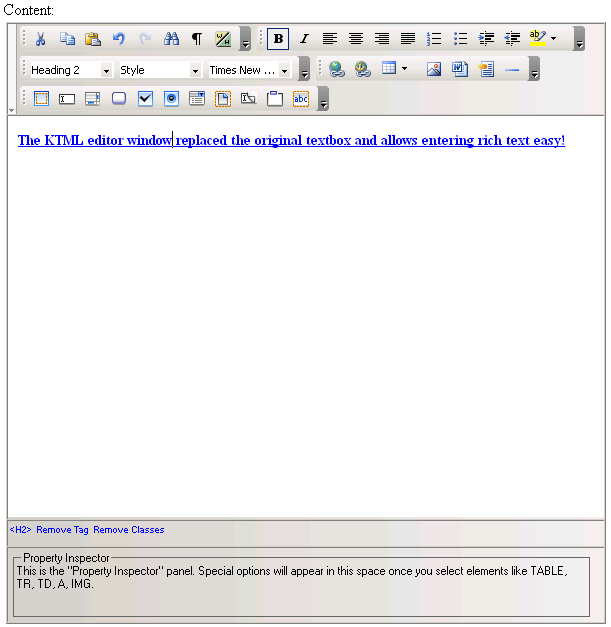
KTML 4 editor will be displayed:
